
Define Strata Solids
To access this screen:
-
Setup ribbon >> Strata >> Define.
The Define Strata managed task is part of the managed reserves workflow and is used to specify the surfaces that will be used to construct an enclosed strata volume that defines structural boundaries within your reserves solids. Strata volumes can be used to describe discontinuities in the volumes you wish to segment into mining blocks, and their subsequent evaluation and scheduling.
A common use of this task would be, for example, to define one or more strata that naturally subdivide your pit phase volumes into discrete blocks of material that may require independent processing attention, say, an intrusion of material that is regarded as waste and should be scheduled accordingly.
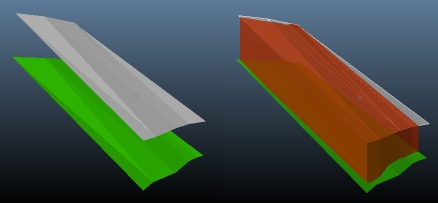
Strata are either generated from 3D surfaces (roof and floor) or they are imported as 3D volumes. The generated or imported strata represent a geological structure. These surfaces can be derived, for example, from a resource model representing rock type boundaries. Once defined, reserves workflow tasks can both recognize and adapt to the additional boundary information within your phase data.

As with all managed tasks, updates made on this panel are committed to your project using the Save (1) or Save and Close (2) buttons at the top of the form. You can also Close without saving (3).
Activity steps:
-
Display the Define Strata Solids screen.
-
Select the Pit to which strata surfaces apply. The pit was configured using the Manage task.
-
Review and edit the Surfaces table, which represents the surfaces from which strata volumes can be created. The Topography (as defined in the Surface Topo task) will always be listed here.
-
Import additional 3D surface data (DTMs) using Import. This displays the Import Strata Wireframe(s) screen from which you can select your roof or floor surface and (optionally) a key field and (optionally) a value if the imported file contains multiple surfaces.
-
Surfaces will be analysed to determine a mean elevation, which will be reported in the Elevation column. You can sort your imported surfaces in descending value order using the Sort by Elevation button. Alternatively, you can position your strata in any list position using the Move Up and Move Down buttons.
Note: This arrangement is cosmetic and has no impact on how strata volumes are created (in which you specify the roof and floor surfaces explicitly).
-
You can remove surface entries from the list using Delete or Delete All. You cannot undo these functions, but data can be re-imported if required.
Note: You don't have to create strata from surfaces; if you already have 3D volumes representing strata, they can be imported using the Strata >> Import function below.
-
-
Review and edit the Strata table, where strata volumes are defined by specifying a pre-imported Roof and Floor surface. Volumes are projected between these.
-
Click Create to generate a volume for the selected table row item, or Create All to generate volumes for all strata specifications. Resulting volumes will be verified to ensure they can be used for reserves data generation later:
Note: Strata volumes can be displayed or hidden using the corresponding check box in the Solid column.
-
You can rename your strata volume objects by double-clicking the Name column and entering a new title. By default, names are set to "Strata n" where n is the next available index number.
-
Remove strata volume entries from the list using Delete or Delete All. You cannot undo these functions, but data can be re-imported or recreated if required.
-
-
Optional: enter thresholds to remove small or thin solids.
-
Enter a value in Remove solids with volume below to automatically remove solids below the specified volume.
-
Enter a value in Trim solids with thickness below to automatically remove solids below the specified thickness.
-
-
Save your task settings.
-
Save your project.
Related topics and activities